Tuesday, May 5, 2015

Why We Can't Create Con Folder in Windows ?

A Reason Behind Why We Can't Create Specific Folders in Windows

Most of us are aware, we can't create a folder with name "Con" in windows and all most many of us don't know the reason.

Well I present you the reason and list of keywords which we can't use in windows to create folders or file.

Reason:

We cannot create folder with con, aux, nul because these are reserved keywords used by DOS. So if we were allowed to create such folders than there will be an ambiguity, in where to write data when the data is supposed to; go to the specified devices.
 
Keywords and Their corresponding Functions:
Reserved KeywordsFunction
CONKeyboard and Display
PRNSystem list device, usually a parellel port
AUXAuxiliary Device,usually a serial port
NULBit-Bucket Device
A:-Z:Drive Letter
COM1First Serial communications port
COM2Second Serial communications port
COM3Third Serial communications port
COM4Fourth Serial communications port
LPT1First Parallel printer port
LPT2second Parallel printer port
LPT3Third Parallel printer port
    

Monday, October 6, 2014

Wednesday, October 1, 2014

Wednesday, July 2, 2014

Thursday, April 10, 2014

Difference between Next Generation Firewall (NGFW) and Unified Threat Management (UTM)

Hello Everyone !!! Hope you all are doing fantastic. A lot of people has hold confusion in  UTM and Next Generation Firewall  (NGFW), recently I came across a very good explanation and I hope it helps you in opening up your mind. For more detail click on the below link
http://blog.anitian.com/utm-v-ngfw-a-single-shade-of-gray/
    

Saturday, March 15, 2014

Wednesday, March 12, 2014

File System Hierarchy Standard (FHS) in Linux


  • The File System Hierarchy Standard (FHS) defines the directory structure and directory contents in Linux operating systems.
  • Basically, it is a formalization and extension of the traditional Berkeley Software Distribution (BSD) file system hierarchy.
  • The FHS is maintained by the Linux Foundation.
  • In the FHS all files and directories appear under the root directory "/", even if they are stored on different physical or virtual devices.

Directories and their Description


Monday, March 10, 2014

VM's For Fortinet Devices

Below are the some external link of VM's for Fortinet devices that I recently came across !!!!

1. Fortinet VM
Click on the below link to download !!!!

2. FortinetAnalyzer 
Click on the below link to download !!!!

3. FortinetMail 
Click on the below link to download !!!!

4. FortinetManager
Click on the below link to download !!!!

5. FortinetWeb
Click on the below link to download !!!!


Saturday, March 8, 2014

Redhat Linux Enterprise 6.1 Step by Step Installation

Screen 1:
Options
  1. If you are installing Redhat Linux for time or if you are upgrading from system older version to this version (new version)
  2. If you are looking to install vga drivers then go for second one
  3. If you are OS or Grub is corrupted then select this option for rescue
  4.  In case of boot local dirve
Screen 2:
Media Check : This option is used for checking installation media if it's working properly or not. Checks installation media whether all files exists or not. To avoid media checking select "Skip"

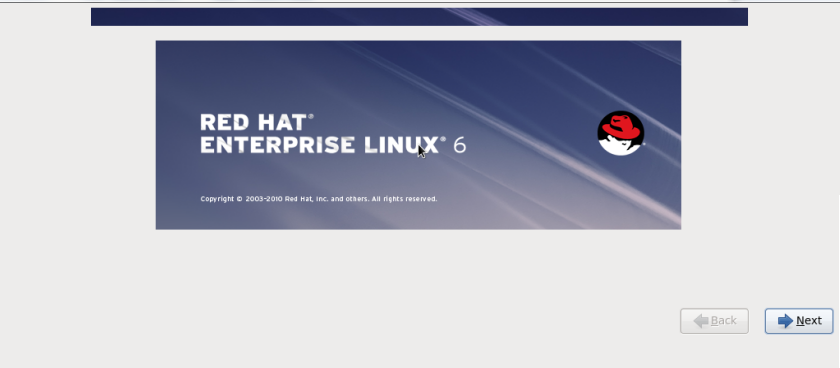
Screen 3:
Welcome screen :  click on "Next"

Screen 4:
Language selection : select your desired language and then click on "Next"


Screen 5:
Keyboard Selection : Select your desired  keyboard layout and then click on "Next"

Screen 6:
Storage Selection :  if you are planing to install on local hard disk or local media then  select first option; in case of SAN (Storage Area Network) select the second option and follow the steps.. Here I'm proceeding with first option i.e., Basic Storage Devices and then click on "Next"

Screen 7:
This screen usually appears when you are trying to install on Virtual Machine, so just click on "Yes, discard any data"

Screen 8:
Hostname and Configure Network, Enter the desired hostname(Server name) and you can even configure Network by clicking on "Configure Network" option to download additional packages from Redhat. Here I'm moving ahead with default option, Click on "Next".

Screen 9:
Time Zone Selection : Select the desired time zone and then Click on "Next"

Screen 10:
Root Password : Root is considered as super user in Linux, similar to Administrator in Window. Enter the password for the root and then click on "Next".

Screen 11:
Installation Type :
Use All Space : Erases all partitions and uses the entire hard disk for Redhat
Replace Existing Linux System(s) : Detect the Linux partition and replaces it with this version
Shrink Current System : This is used if you already installed Linux and looking to free up some space
Use Free Space : Detect unallocated or free  space and uses it. Other partitions are untouched.
Create Custom Layout : Manually creating your own partitions.

Screen 12 : 
Here you can see free space, select the free space in case of multiple hard disks and then click on "Create"

Screen 13 :
Standard Partition : Select this option if you have single hard disk and if you are looking to install Redhat on it
RAID Partition : Select this option if you are looking for Backup or more IOPS or more performance
LVM : Select this option when you have multiple physical hard disk and if you are looking to logically group them. LVM stands for Logical Volume Manager

In this case I'm proceeding with first option i.e,. Standard Partition and then Click on Create.

Screen 14 :
Mount Point : Create a mount point where Redhat and it's related files can be installed. Here I'm selecting '/' called root partitions and specify the size and then click on "OK"

Screen 15 :
 This is a warning that we have not created swap partition which is like virtual memory, it is recommended to create a swap partition for performance purpose.... As I'm not interested in swap so I'm going to proceed without creating a swap partition and click on "Yes"

Screen 16:
This is a conformation window, your changes are going to reflect on hard disk. If you are sure then Click on "Write changes to disk"

Screen 17:
Installing boot loader, click on "Next"

Screen 18:
For CLI management select first option, for both CLI and GUI management Select Desktop. Click on "Next" After Selection installation will begin and you won't able to revert back.

Screen 19:
This is a conformation that installation has complete and reboot the system.... Click on "Reboot"

Screen 20
These are post installation steps, this is like welcome screen so click on "Forward".

Screen 21 : 
EULA (End User License Agreement) : If you agree select "Yes, I agree to the License Agreement" and then click on "Forward" 

Screen 22 :
Software Updates : If you have subscription from Redhat then set up updates and then Click on "Forward" as I don't have any subscription so I'm clicking on "Forward"

Screen 23 :
 If you want to create additional users other than root then create. As I'm interest click on "Forward" and then click on "Yes"

Screen 24 :
Date and Time : Date and Time selection window, configure the desired date and time and then click on "Forward".

Screen 25 :
Kdump : Kdump helps in case of Kernel crash and helps in storing logs....

Screen 26 : 
Final Screen, to get inside the system Login with root credentials...

For Tutorial link on the below links :

Friday, March 7, 2014

Redhat Linux Enterprise 6.1 Hardware Requirements

Architecture
  • Redhat Can be installed on both Architectures i.e, 32bit as well as 64 bit.
Minimum Memory
  • Red Hat recommends for 32 bit a minimum of 1GB memory/logical CPU, and
  • For 64 bit a minimum of 1GB of memory, 1GB/logical CPU. 
  • It can be even installed on 512MB but it can bog down when open mutiple applications
Minimum Disk Space
  • Minimum disk size of above 12 GB, and a minimum root partition ("/") size of about 9 GB.

Wednesday, March 5, 2014

Tuesday, March 4, 2014

SonicWALL TZ 100 Appliance Hardware Specification

SonicWall is UTM (Unified Threat Machine) with following features

  • Firewall (Unified Threat Machine)  
    • Gateway Anti-virus
    • Anti-Spyware
    • Anti-Spam
    • Website/Content Filtering
    • Intrusion Prevention/Detection
    • Email Filtering 
    • Zero Day Protection
  • Router
  • VPN Server (IP-Sec and SSL-VPN Remote Access)     
  • ISP Load Balancer/Failover
  • Bandwidth Manager
  • IP and MAC Address Binding
  • Enforced Client Anti-virus  (MacAfee)
  • Built-in DHCP Server
  • Network Monitoring and Reporting Tool - Viewpoint


Stateful Throughput
100 Mbps
GAV Throughput
35 Mbps
IPS Throughput   
50 Mbps
UTM Throughput
25 Mbps
IMIX Throughput
40 Mbps
Maximum Connections
6,000
Maximum UTM Connections
6,000
New Connections/Sec
1,000
Nodes Supported
Unrestricted
Denial of Service Attack Protection
22 classes of DoS, DDoS and scanning attacks
SonicPoints Supported
1

Monday, March 3, 2014

ASA Family

ASA 5505 Features

ASA Front Panel

ASA Back Panel


-> Designed for Small Offices, home offices and remote office security and for VPN Solutions
-> Supports up to 16,000 concurrent connections with security Plus license
-> Delievers 100-Mbps firewall throughput
-> Built-in Layer 2 switch with eight Fast Ethernet ports
-> Supports Active/Standby Failover
-> Supports Site to Site, Remote access and WebVPN
-------------------------------------------------------------------------------------------------------------------------------------

ASA 5510 Features

Front Panel

Back Panel

-> Delievers advanced security and networking services, including high-performace VPN services, for small and medium-sized business and enterprise branch offices.
-> Supports up to 130,000 concurrent connections
-> Supports up to 300 Mbps firewall throughtput
-> Has 4 filtering ports, 1 Management port.
-> Supports 25 Vlans and 5 contexts
-> Supports Active/Standby
-> Site to Site (250 peers), Remote access and WebVPN
->Support for additional modules, like SSMs, etc.,
-------------------------------------------------------------------------------------------------------------------------------------

ASA 5520

-> Delievers advanced security and networking services, including high-performace VPN services, medium-sized business and enterprise networks.
-> Supports up to 280,000 concurrent connections
-> Supports up to 450 Mbps firewall throughtput
-> Has 4 filtering ports, 1 Management port.
-> Supports 100 Vlans and 20 contexts
-> Supports Active/Standby and Active/Active
-> Site to Site (750 peers), Remote access and WebVPN
->Support for additional modules, like SSMs, etc.,
-------------------------------------------------------------------------------------------------------------------------------------

ASA 5540

-> Delievers advanced security and networking services, including high-performace VPN services, for medium-sized, large enterprise networks and service provider networks.
-> Supports up to 400,000 concurrent connections
-> Supports up to 650 Mbps firewall throughtput
-> Has 4 filtering ports, 1 Management port.
-> Supports 200 Vlans and 50 contexts
-> Supports Active/Standby, Active/Active
-> Site to Site (5,000 peers), Remote access and WebVPN
->Support for additional modules, like SSMs, etc.,
-------------------------------------------------------------------------------------------------------------------------------------

ASA 5550

Front Panel

Back Panel 


-> Delivers high-performance, high-density security services, including high-performace VPN services, for large enterprise networks and service provider networks.
-> Supports up to 650,000 concurrent connections
-> Supports up to 1.2 Gbps firewall throughtput
-> Has 8 Gigabit interfaces, 4 SFP fiber ports and 1 10/100 Fast Ethernet interface but only 8 of 12 ports can be actvice simultaneously.
-> Supports 200 Vlans and 50 contexts
-> Supports Active/Standby, Active/Active
-> Site to Site (5,000 peers), Remote access and WebVPN
->Support for additional modules, like SSMs, etc.,
-------------------------------------------------------------------------------------------------------------------------------------

Configuring IPsec Site-Site VPN on Cisco Routers

Lab Topology


Configuration on Router R1 (Site-A)

Step 1: Defining ISAKMP Policy phase 1


crypto isakmp enable
crypto isakmp policy 10
encryption 3des
authentication pre-share
group 2
hash md5
!
! authentication method pre-share and remote peer address
crypto isakmp key arshnetworks address 8.8.8.2
!
! Defining IPSec parameters, which are commonly known as Phase 2 Parameters Of VPN
crypto ipsec transform-set t-set-1 esp-3des esp-md5-hmac
exit
! defining when VPN should form
!
access-list 101 permit ip host 11.11.11.11 host 33.33.33.33
!
! creating crypto map to bind all parameters together
!
crypto map vpn-map 10 ipsec-isakmp
set peer 8.8.8.2
set transform-set t-set-1
match address 101
exit
! Applying on the WAN interface
int f 0/0
crypto map vpn-map

Configuration on Router R3 Site-B

crypto isakmp enable
crypto isakmp policy 10
encryption 3des
authentication pre-share
group 2
hash md5
!
crypto isakmp key arshnetworks address 7.7.7.1
!
crypto ipsec transform-set t-set-2 esp-3des esp-md5-hmac
!
access-list 101 permit ip host 11.11.11.11 host 33.33.33.33
!
crypto map vpn-map-2 10 ipsec-isakmp
set peer 7.7.7.1
set transform-set t-set-2
match address 101
exit
!
int f 0/0
crypto map vpn-map-2